Installation
Reading the step by step instructions below is highly recommended.
CS:DM requires an accessible PostgreSQL database to work properly.
You can watch the following videos to see the installation steps:
Step 1: The database
A PostgreSQL database version 17 or later is required to use CS Demo Manager, the application will show the following screen until a connection has been established:
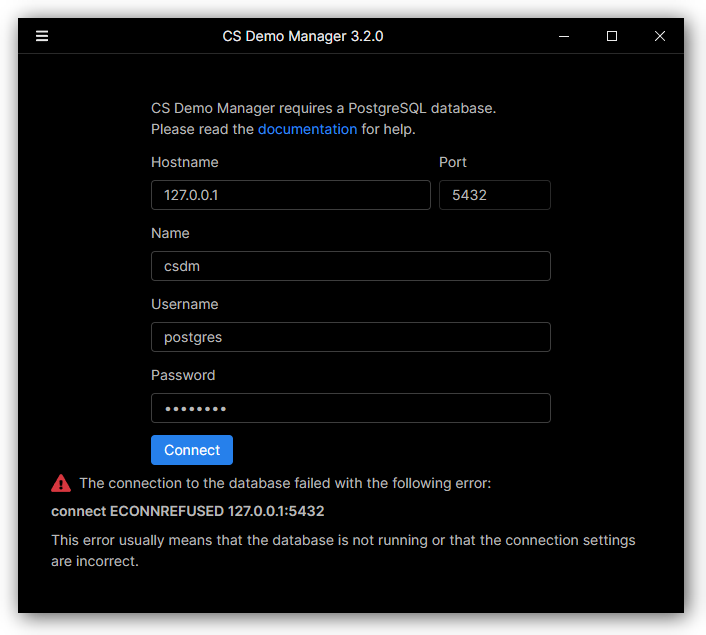
If you want to run the database in a Docker container please read this documentation.
- Windows
- macOS
- Linux
- Download the last PostgreSQL installer and launch it.
- Click on
Nextuntil you reach theSelect Componentsstep:
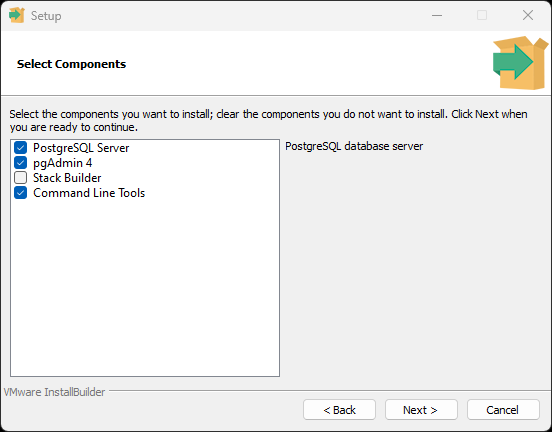
- The mandatory components are
PostgreSQL ServerandCommand Line Tools, the others are optional. - Click on
Nextuntil you reach thePasswordstep:
- Choose a password for the
postgresuser and remember it. You will need it later. - Click on
Nextuntil you reach thePortstep:
- It's recommended to use the default port
5432but you can change it if you want. - Click on
Nextand when the installation is finished, click onFinish.
- Download the last PostgreSQL installer and launch it.
- Click on
Nextuntil you reach theSelect Componentsstep:
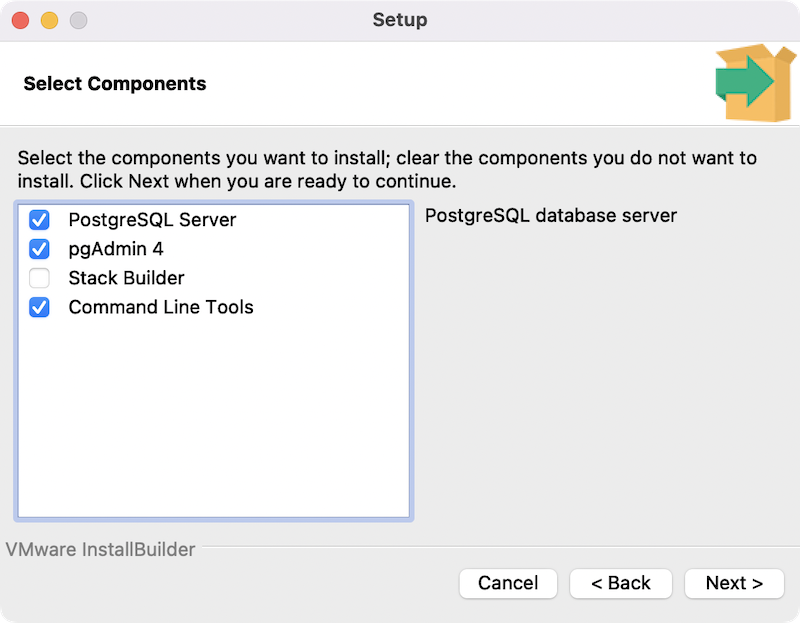
- The mandatory components are
PostgreSQL ServerandCommand Line Tools, the others are optional.
pgAdminis a GUI tool to manage the database, you may find it useful. - Click on
Nextuntil you reach thePasswordstep:
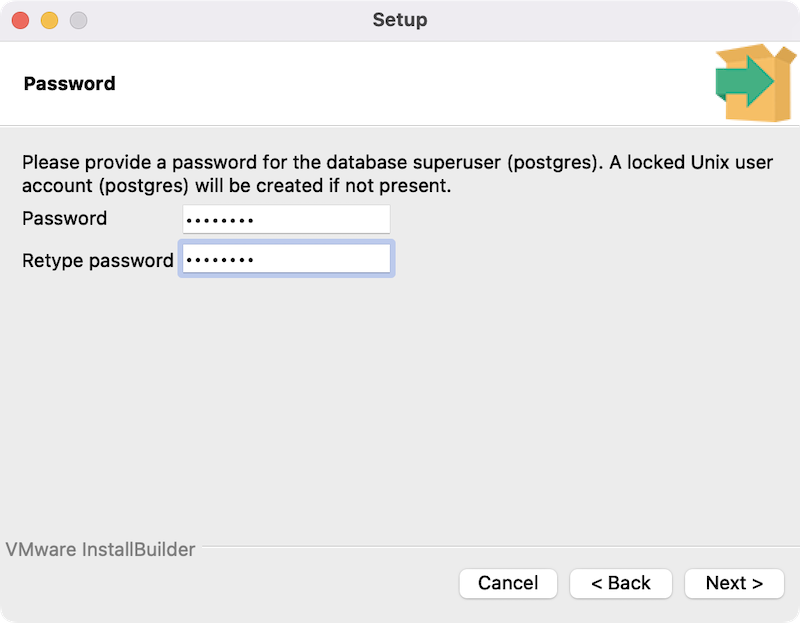
- Choose a password for the
postgresuser and remember it. You will need it later. - Click on
Nextuntil you reach thePortstep:
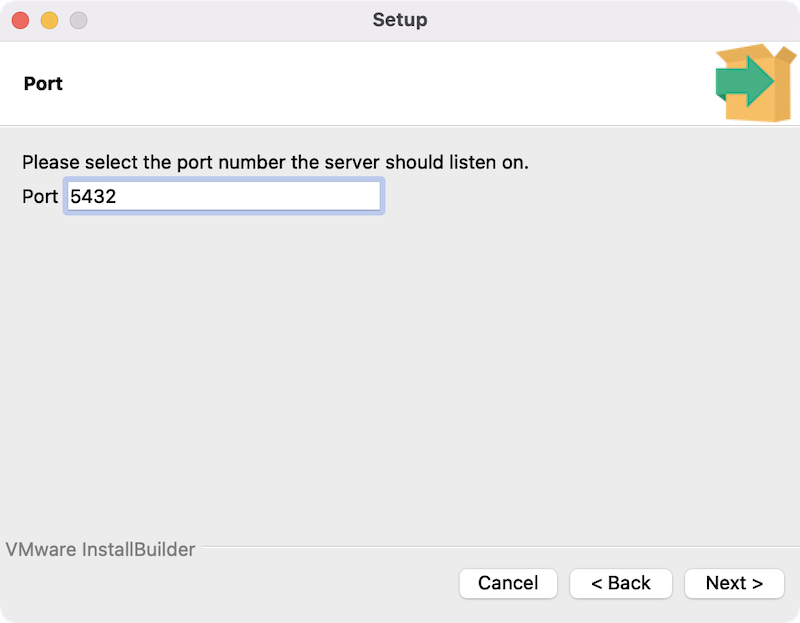
- It's recommended to use the default port
5432but you can change it if you want. - Click on
Nextand when the installation is finished, click onFinish.
Instructions depend on your Linux distribution, please refer to the official documentation.
Once PostgreSQL is installed (run psql --version to make sure it's installed), you have to change the postgres user password:
sudo -u postgres psqlALTER USER postgres PASSWORD 'mypassword';\qto quitpsql
Step 2: Setup psql
The psql program is the PostgreSQL command-line interface used by CS Demo Manager to create the database automatically.
This step explains how to add psql to your PATH environment variable so that the application can find it and invoke it.
- Windows
- macOS
- Linux
- Make sure you installed the
Command Line Toolscomponent during the PostgreSQL installation. - Press
Windows+Xto open the the Power User Task Menu. - Click on
System. - Click on
Advanced system settings. - Click on
Environment Variables... - Select the
Pathvariable from theUser variablespanel at the top and click onEdit - Click on
Browseand select the folderC:\Program Files\PostgreSQL\17\bin.cautionIf you changed the default PostgreSQL installation path (
C:\Program Files\PostgreSQL\VERSION\bin), you have to select the correct folder. - Click on
OK - Restart the application. Make sure to quit it entirely from the tray icon.
- Make sure you installed the
Command Line Toolscomponent during the PostgreSQL installation. - Open the macOS
Terminalapplication, typepsql --versionand pressEnter.
If the output is something likepsql (PostgreSQL) XX.XX, you can skip this step, otherwise continue. - Still from the
Terminalapplication, type the following command and pressEnter:echo '\nexport PATH="/Library/PostgreSQL/17/bin:$PATH"' >> ~/.zshrccaution- If you changed the default PostgreSQL installation path (
/Library/PostgreSQL/VERSION/bin), you have to adjust the above command accordingly. - The above command assumes that the you are using the default macOS shell
zsh(since Catalina).
If you are using another shell, you have to replace~/.zshrcwith the correct configuration file.
- If you changed the default PostgreSQL installation path (
- Quit completely the
Terminalapplication. - Repeat the first step, this time the output should be something like
psql (PostgreSQL) XX.XX. - Restart the application. Make sure to quit it entirely from the status bar menu.
It's automatically done during the PostgreSQL installation.
Step 3: The application
- Windows
- macOS
- Linux
- Download the last CS Demo Manager installer from GitHub and install it.
- Type the password you chose during the PostgreSQL installation and click on "Connect".
- Download the last CS Demo Manager installer from GitHub and install it.
- Type the password you chose during the PostgreSQL installation and click on "Connect".
- Debian-based distributions
- Red Hat-based distributions
- Arch Linux
- AppImage
- Download the latest
debinstaller from GitHub sudo apt install ./cs-demo-manager_<version>_amd64.deb(replace<version>with the actual version number)
You must enable the GNOME AppIndicator tray extension to see the app icon!
sudo dnf install gnome-shell-extension-appindicatorsudo dnf install gnome-extensions-app- Reboot
- Open the
Extensionsapplication and enableAppIndicator and KStatusNotifierItem Support
- Download the latest
rpminstaller from GitHub sudo dnf install ./cs-demo-manager-<version>.rpm(replace<version>with the actual version number)
For Arch-based distros there is a community-maintained AUR package based on the AppImage releases for easier installation and updating. Using paru you can install cs-demo-manager-appimage with
paru -S cs-demo-manager-appimage
or with yay
yay -S cs-demo-manager-appimage
Other AUR helpers or pacman wrappers obviously work also. Do NOT report build or installation issues on Github; instead use the comment section on the AUR. Likewise please don't report application specific bugs on the AUR, except in the rare case that the bug only happens when using the AUR package.
- Download the latest AppImage from GitHub
- Make it executable:
chmod +x cs-demo-manager-<version>.AppImage(replace<version>with the actual version number) - Run it:
./CS-Demo-Manager-<version>.AppImage
Troubleshooting
Anti-virus reports
See the FAQ.
Can I use a remote database?
Yes, see the documentation.
PSQL binary not found
If you have the error message "PSQL binary not found" it means that the PostgreSQL psql program is not in your PATH environment variable.
Please follow the Step 2: Setup psql instructions to fix this issue.
ECONNREFUSED error
This error means the PostgreSQL server is not running or is not reachable.
You should:
- Make sure the postgresql service is running. On Windows you can do this by doing the following:
- Search for services from the Windows search bar and open the Services application.
- Find the service postgresql-x64 and ensure it's running. If it's missing, it means PostgreSQL is not installed.

- Make sure the port is correct. The default port is 5432, but you may have changed it during installation.
- Open a terminal (cmd.exe on Windows)
- Type
psql -h 127.0.0.1 -U postgres -p 5432and press enter. If you have the same error, chances are the port is incorrect.
- Re-install PostgreSQL and make sure to set the port to 5432 during the installation.
If you are using a remote database, ensure the server is running, and the IP and port are correct.
The app tray icon is missing
On RedHat-based Linux distributions the system tray is not enabled by default.
You have to install the "Gnome extensions app" and enable it to see the tray icon as mentioned in the installation instructions.